This article will explain the two methods of assessing and banding applications depending on your systems specification. In rare occasions your system may differ slightly depending on your allocations policy.
TABLE OF CONTENTS
- View current banding
- View assessment history
- Assisted or Auto Assessment
- Manual Assessment
- Changing the status of an applicant
View current banding
If you would like to view an applicants current banding, follow the steps below:
- Click on either the "Summary" or "Assessment" tab.
- The "Show ineligible reasons" toggle on the Assessment page will display all the systems banding reasons. To view guidance and make changes, click on a reason.

Did you know: In most cases, the applicant will be able to view their current band or points and band reason when they log into their online account.
View assessment history
To see an applicant's previous bands, band reasons or points, follow the steps below:
- Click on the "Assessment" tab.
- Click the "View Assessment History over time" icon.
- Select a previous assessment to view the details.

Assisted or Auto Assessment
Assisted or Auto assessment will suggest a band reason depending on what the applicant has entered on their online form or change of circumstance form. Follow the steps below to make changes to the Assisted or Auto Assessment:
- Click on the "Assessment" tab.
- Select a suggested band.
- Choose band level from the dropdown.
- Enter an Overriding Band Date.
- Click "Save changes".
- Change the applicant's status if required by clicking the icon, choosing from the dropdown and "Save".

Manual Assessment
An officer can select the appropriate band, band reason or points for the applicant by using the information they provided in their online form or change of circumstance form. For guidance on how to do this, follow the steps below:
- Click on the "Assessment" tab.
- Click "New Assessment".
- Select a Band, Band Reason and Priority/Band date.
- Click "Save changes".
- Change the applicant's status if required by clicking the icon, choosing from the dropdown and "Save".

Changing the status of an applicant
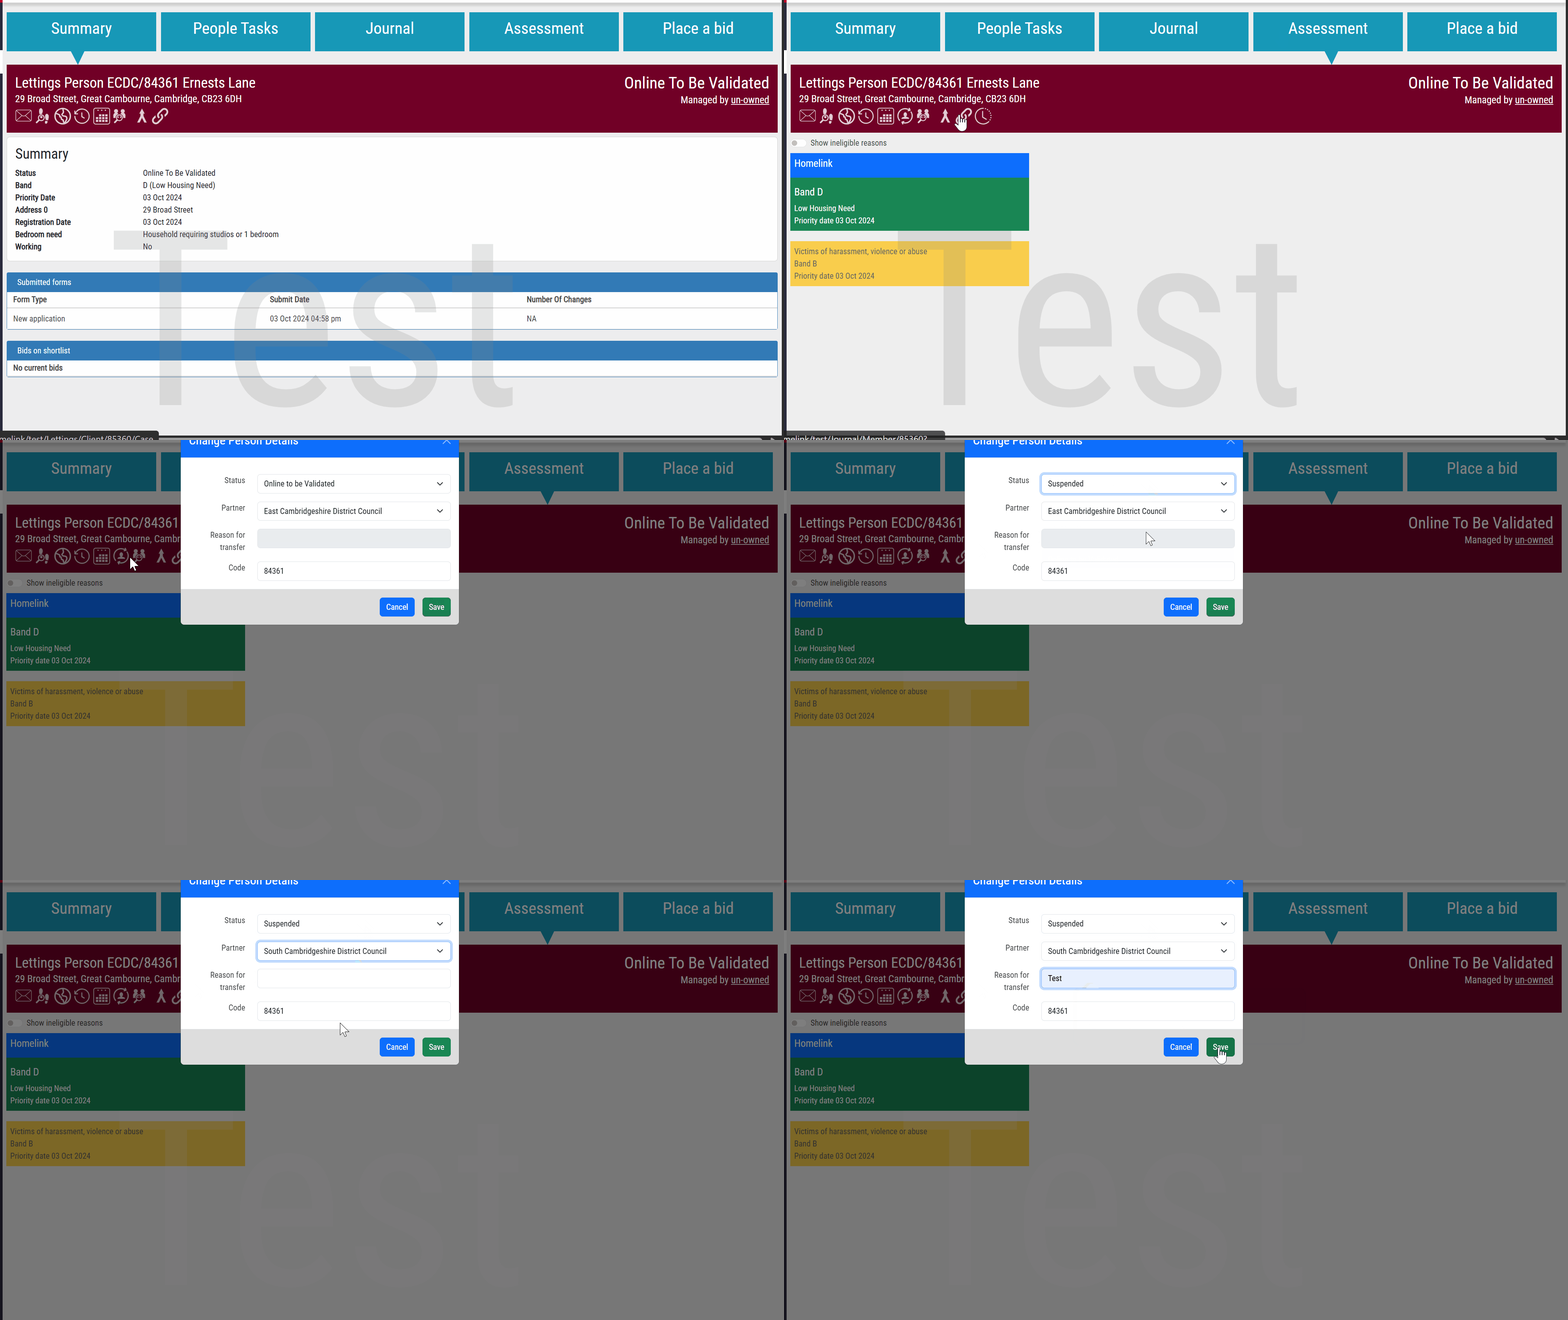
If you need to change the status of an applicant, follow the steps below:
- Click on the "Assessment" tab.
- Click on the "Change this person's status, partner or code" icon.
- Select the new status and partner (if applicable) from the dropdowns
- Add any notes if changing the partner and click "Save".

Note: Changing the applicant's code or prefix is only relevant for some multi partner systems
Was this article helpful?
That’s Great!
Thank you for your feedback
Sorry! We couldn't be helpful
Thank you for your feedback
Feedback sent
We appreciate your effort and will try to fix the article