Access Gate allows Local Authorities to give third parties access to client information and allows other case types to be added to a client.
TABLE OF CONTENTS
- Organisation Access
- Create Case Types for Access Gate
- Roles
- Add an Organisation
- Adding a User to the Organisation
- Grant Access
- Organisation Dashboard and Login
- Organisation Users
Organisation Access
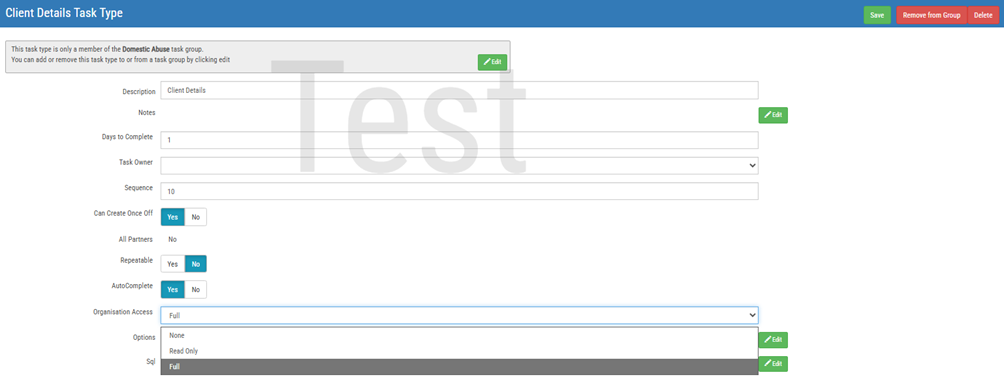
The access organisations have can be controlled by the case type as well as the Organisation Access on the task. This can be set to Full, None or Read Only.
Create Case Types for Access Gate
Case Types define what information organisations can access and the workflow they follow.
Go to Settings. Click Tasks and Questions under Workflow.
Click Other Cases.
Navigate to the relevant Task where the case type will be used or create a new one if required. Remember to grant Organisation Access from the dropdown if required. Click Save.
Add the Case Type (CASETYPO) question to the task by clicking + add, then Add Existing, search CASETYPO and select the question.
Click Edit next to Attribute. Click Add Answer. Fill in a code, answer and sequence. Then click Save.
Click Save on the question.

Did you know: Each case type can have its own bespoke workflow, allowing you to control exactly what information is collected and shared with organisations.
Roles
Each case type will need a role set up which will then be used to control what an organisation has access to.
- Go to Settings. Click Roles under Users and Security.
- Click + New Role.
- Give the role a name and assign the Org View HPA permission.
- Click Save. The role will now be created.

For more information about role management and configuration, click here.
Add an Organisation
- Click Organisations on the left hand side.
- Click the green +.
- Enter the name and a description of the organisation.
- Click Create.
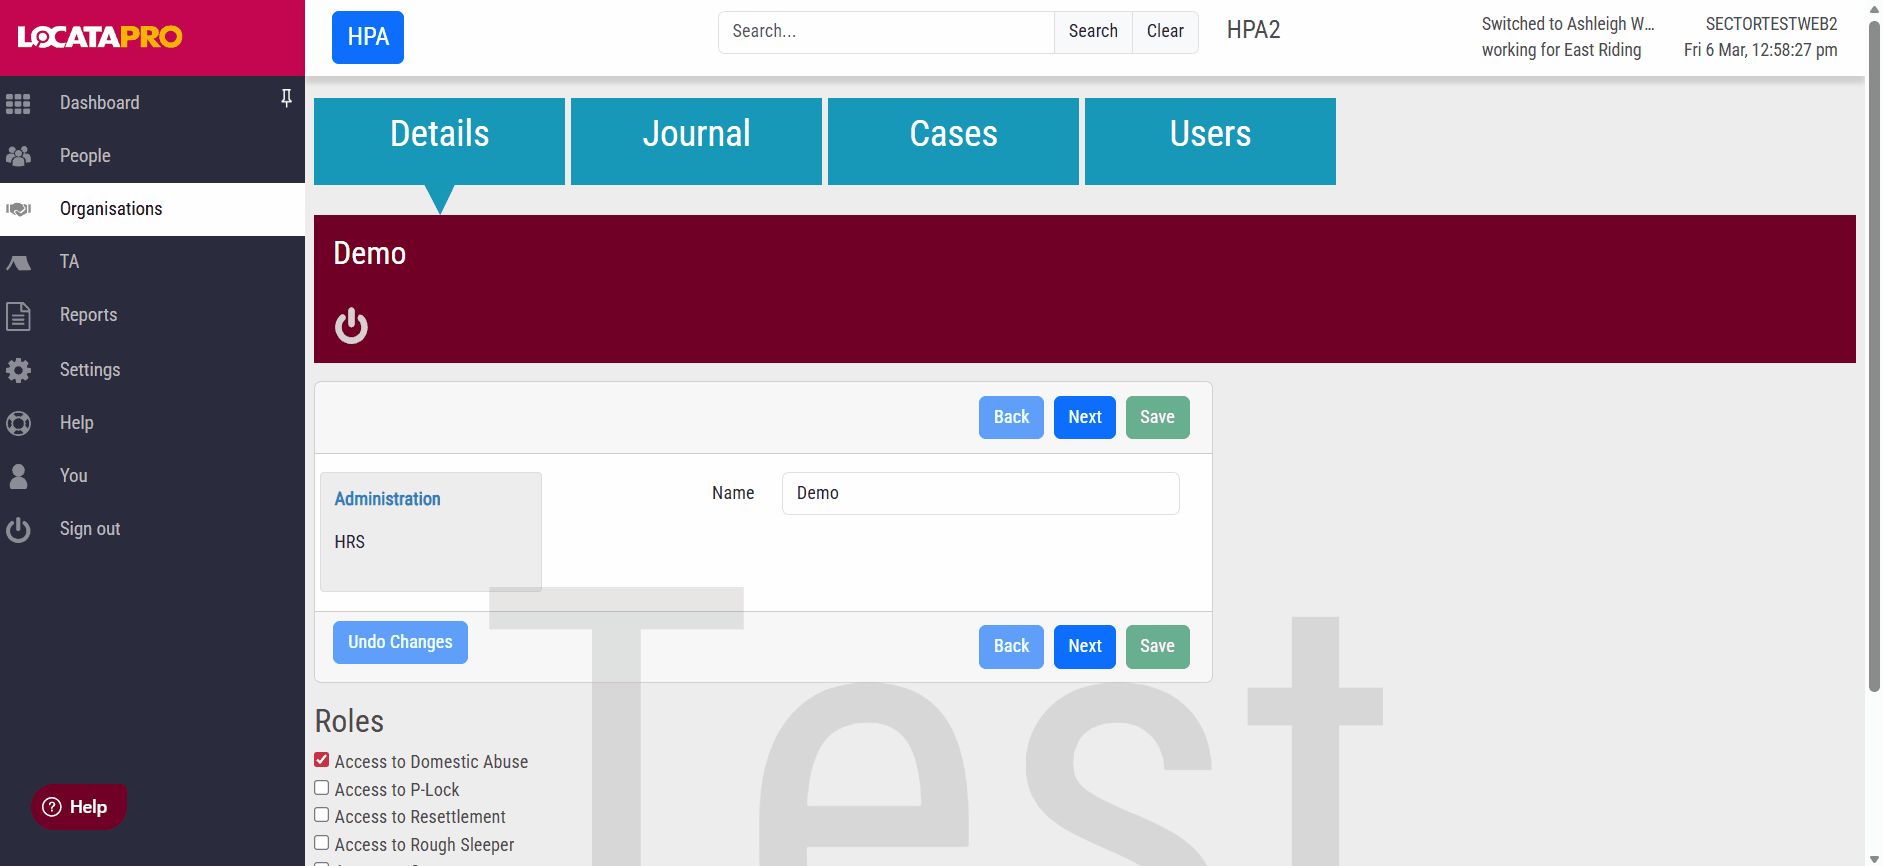
When the organisation is created, you can view:
- the organisations details
- the journal
- the cases that the organisation has access
- their users
You can also assign the "Access to…" roles you want them to have. There is no user interface for the roles so once you have added the role, you can raise a support ticket for it to be added and this will enable it to show under Roles on an organisation.
Adding a User to the Organisation
Local Authorities are responsible for setting up users, they have full control over which users from organisations have access.
- Click the Users tab under the organisation.
- Click + New User.
- Enter the user's details and click Save.
For more information about user management, click here.
Organisation Users
Those organisation users with the relevant permissions can reset the passwords of other users within their organisation.
To do this:
- Click Organisation (left hand menu).
- Select an Organisation and click the Users tab.
- Select the user.
- Click Reset Password.
- Read the security message. Click Ok.
- The user will receive an email with their new temporary password.

Grant Access
To grant access to an organisation:
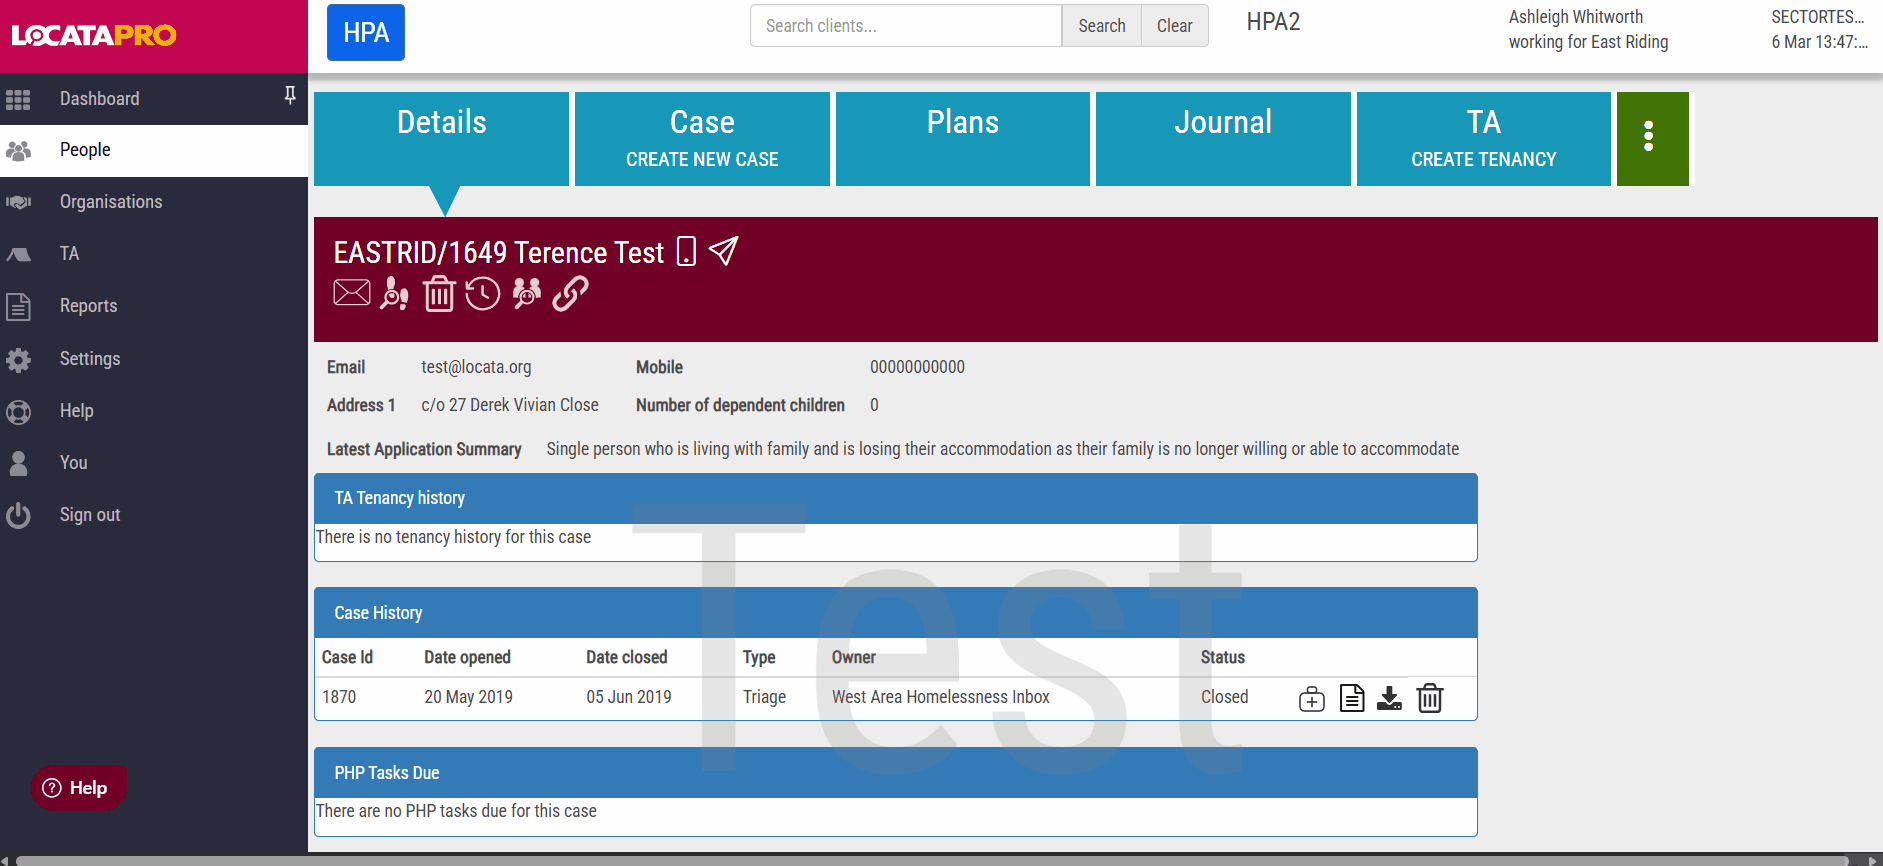
- Go to the Details tab of a client.
- Click the briefcase icon in the Case History box next to a case.
- Choose the Case Type from the drop down in the pop up box.
- Choose an Organisation from the dropdown (this list responds to which case type is selected).
- Click Create Case.
- Click Add a group of tasks.
- Select the relevant group.
Organisation Dashboard and Login
Organisations have a dedicated login page to enter their:
- Username
- Password
- One time access pin
Once logged in they will be shown a dashboard showing any tasks/overdue tasks assigned.
Both cases and tasks can be assigned to specific users within an organisation.

To access any of the cases click on the relevant square on the dashboard or to view all cases click on Cases (left hand menu)
On the cases page you can sort by any of the columns, you can choose to Scroll down the list of cases to select the one to access or you can use the search at the top of the page.
Was this article helpful?
That’s Great!
Thank you for your feedback
Sorry! We couldn't be helpful
Thank you for your feedback
Feedback sent
We appreciate your effort and will try to fix the article